[HtT] Painting Faces & Eyes

I was asked on Twitter how I paint faces, so here’s a tutorial covering a basic human male face. At the end, I’ll cover how I tweak this process for female or non-human faces.
I’m using 100% P3 paints for this, and I’m primarily using a wet palette so I have fairly transparent paint. This lets me use glazing. The faces on models are too small for 2-brush blending, so the best method I’ve seen is glazing – layering thin, transparent layers of paint to build up color.
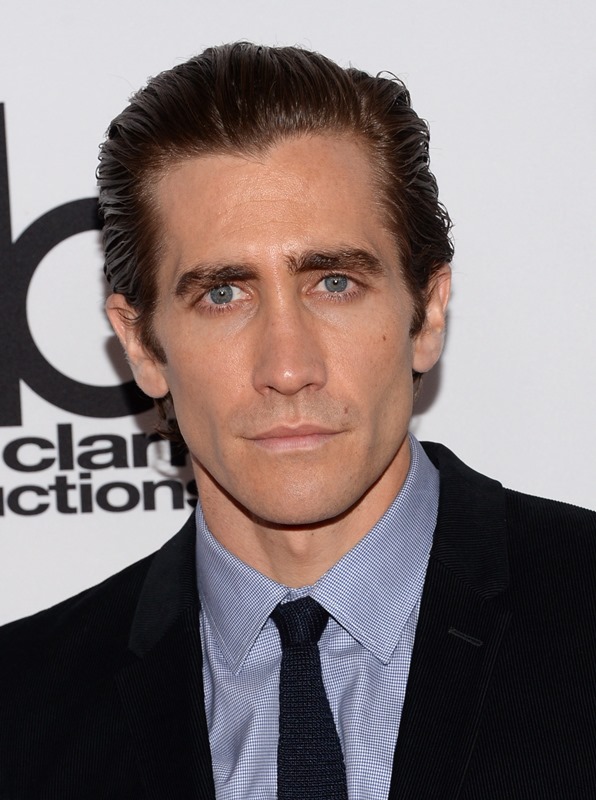
If you haven’t yet, study some faces to see where the shadows are and where the light catches. This is a decent reference:
For this walk-through (and a few more to follow), I will be painting Reaper #2803, Brother Vincent. Feel free to follow along!
I started by priming the model black, and then base coating the face with Midlund Flesh. I used my airbrush for both of these steps to preserve detail, but several thin coats with a brush should do just fine.
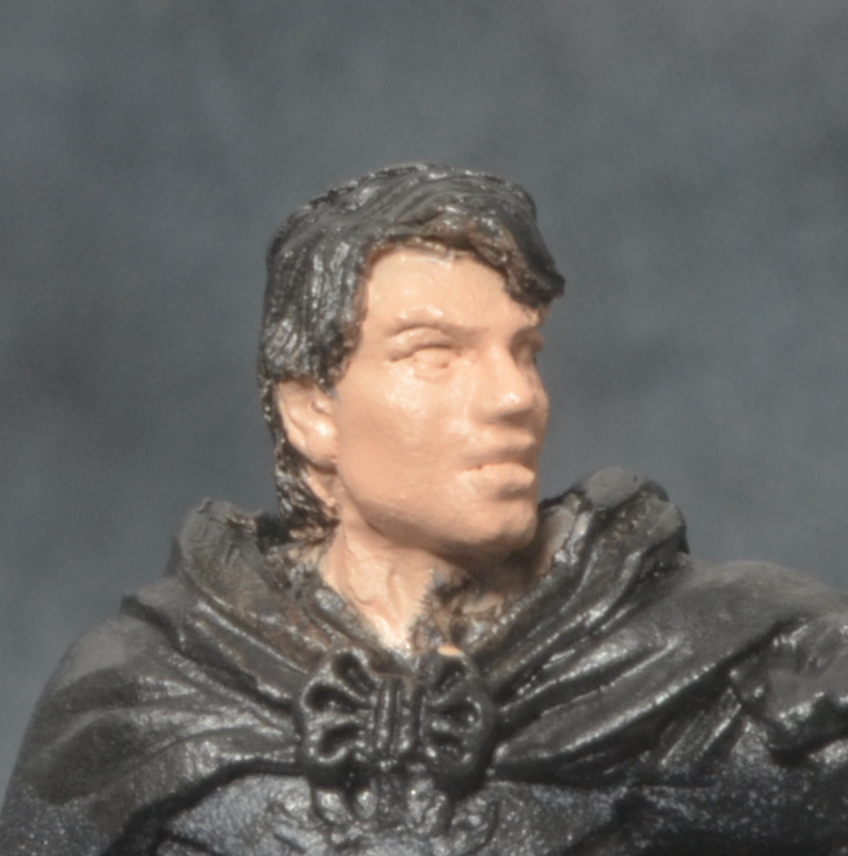
I prefer to start with the shadows. Looking at the reference photos, note the shadows. Predominately, the ones on the sides of the nose, under the brow, under the bottom lip and under the chin. There’s also soft shadows on the upper half of each cheek, where the cheekbones cast some shade.
Paint these in with Khardic Flesh. At this time, I also took the chance to paint the eyes black. This helps break up the face, and make it look a bit more real. It’s hard sometimes to work on these faces when the eyes themselves are “missing”.
Wahoo, shadows! Instantly, the face starts looking less alien and more real. Brother Vincent’s face is out in the open, so I won’t shade past this. If it were in any sort of shadow (like under a hood), then the shadows should be strengthened. One way is to mix in some Sanguine Base with the Khardic Flesh.
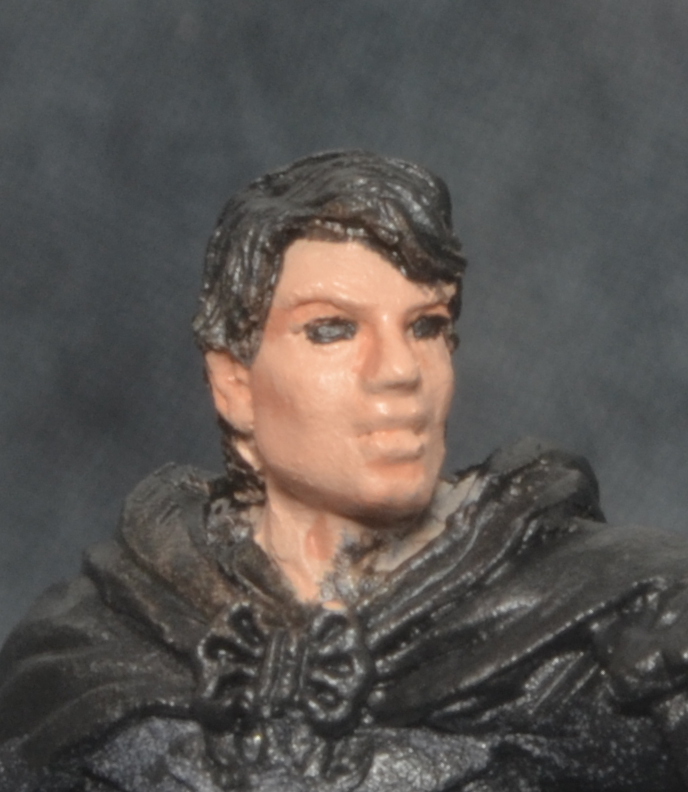
However, I want Brother Vincent to have a bright, youthful face, so I’m going to move on to highlights. Looking back at the reference photo, the brightest spots are the brow, top of the nose and cheekbones. The jawline and tops of the lips are also bright, but not the brightest.
I’m using Ryn Flesh for the first set of highlights here, and I’m hitting every spot listed above.
And for the final highlights, I mix in Menoth White Highlight with the Ryn Flesh. I focus on those brightest spots – the brow, tip of the nose and cheekbones.
While I have the Menoth White Highlight out, I paint in the eyes, leaving the thinnest black outline I can.

Spooky! At this point the skin is done, but the eyes have a fair bit to go.
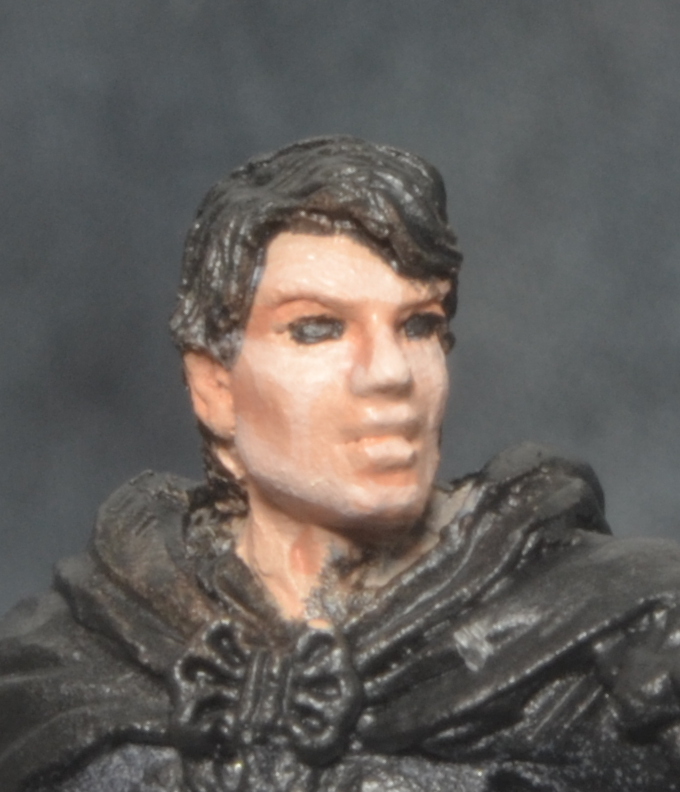
I picked blue eyes for Brother Vincent, for no real reason. Whatever color you pick, I suggest using a shade brighter color than you want the eye color to be. Because they are so small, the tiny spot of color looses most of it’s presence, and the stronger color makes up for that. I’m using Cygnar Blue Highlight.
Paint a large circle, leaving just a sliver of white on the inside and outside edge of the eye.
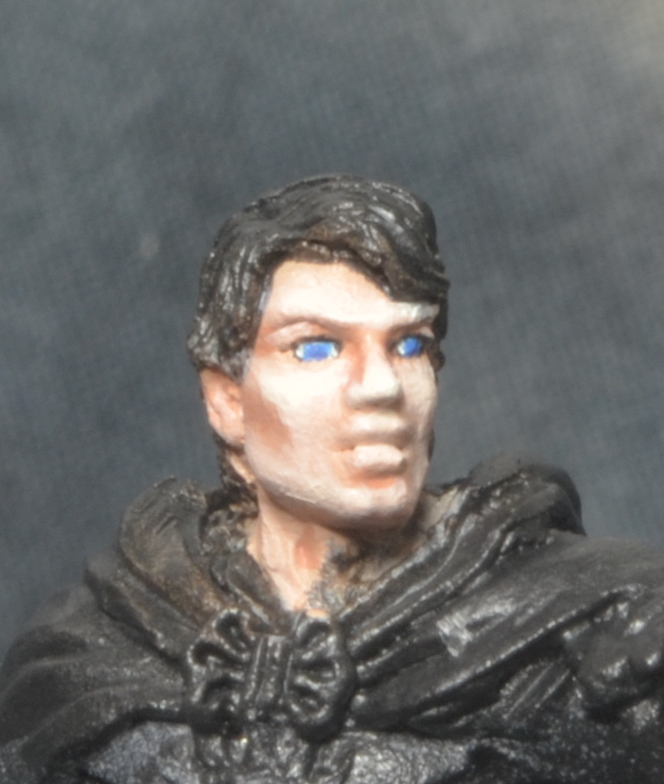
Next, paint a small black dot inside the blue one. Then, paint a white dot off center to be the reflection of light glinting off the shiny eye.
As you can see, I didn’t get the black dot centered very well. That’s OK though, because at this scale, it hardly matters. The eye’s not 100% blue, which would be weird, and the overall impression is there. Good enough!
For a female face, ratchet all the colors up one level. Basecoat with Ryn Flesh, highlight with Menoth White Highlight, and shade with Midlund Flesh. The deepest shadows would be Khardic Flesh.
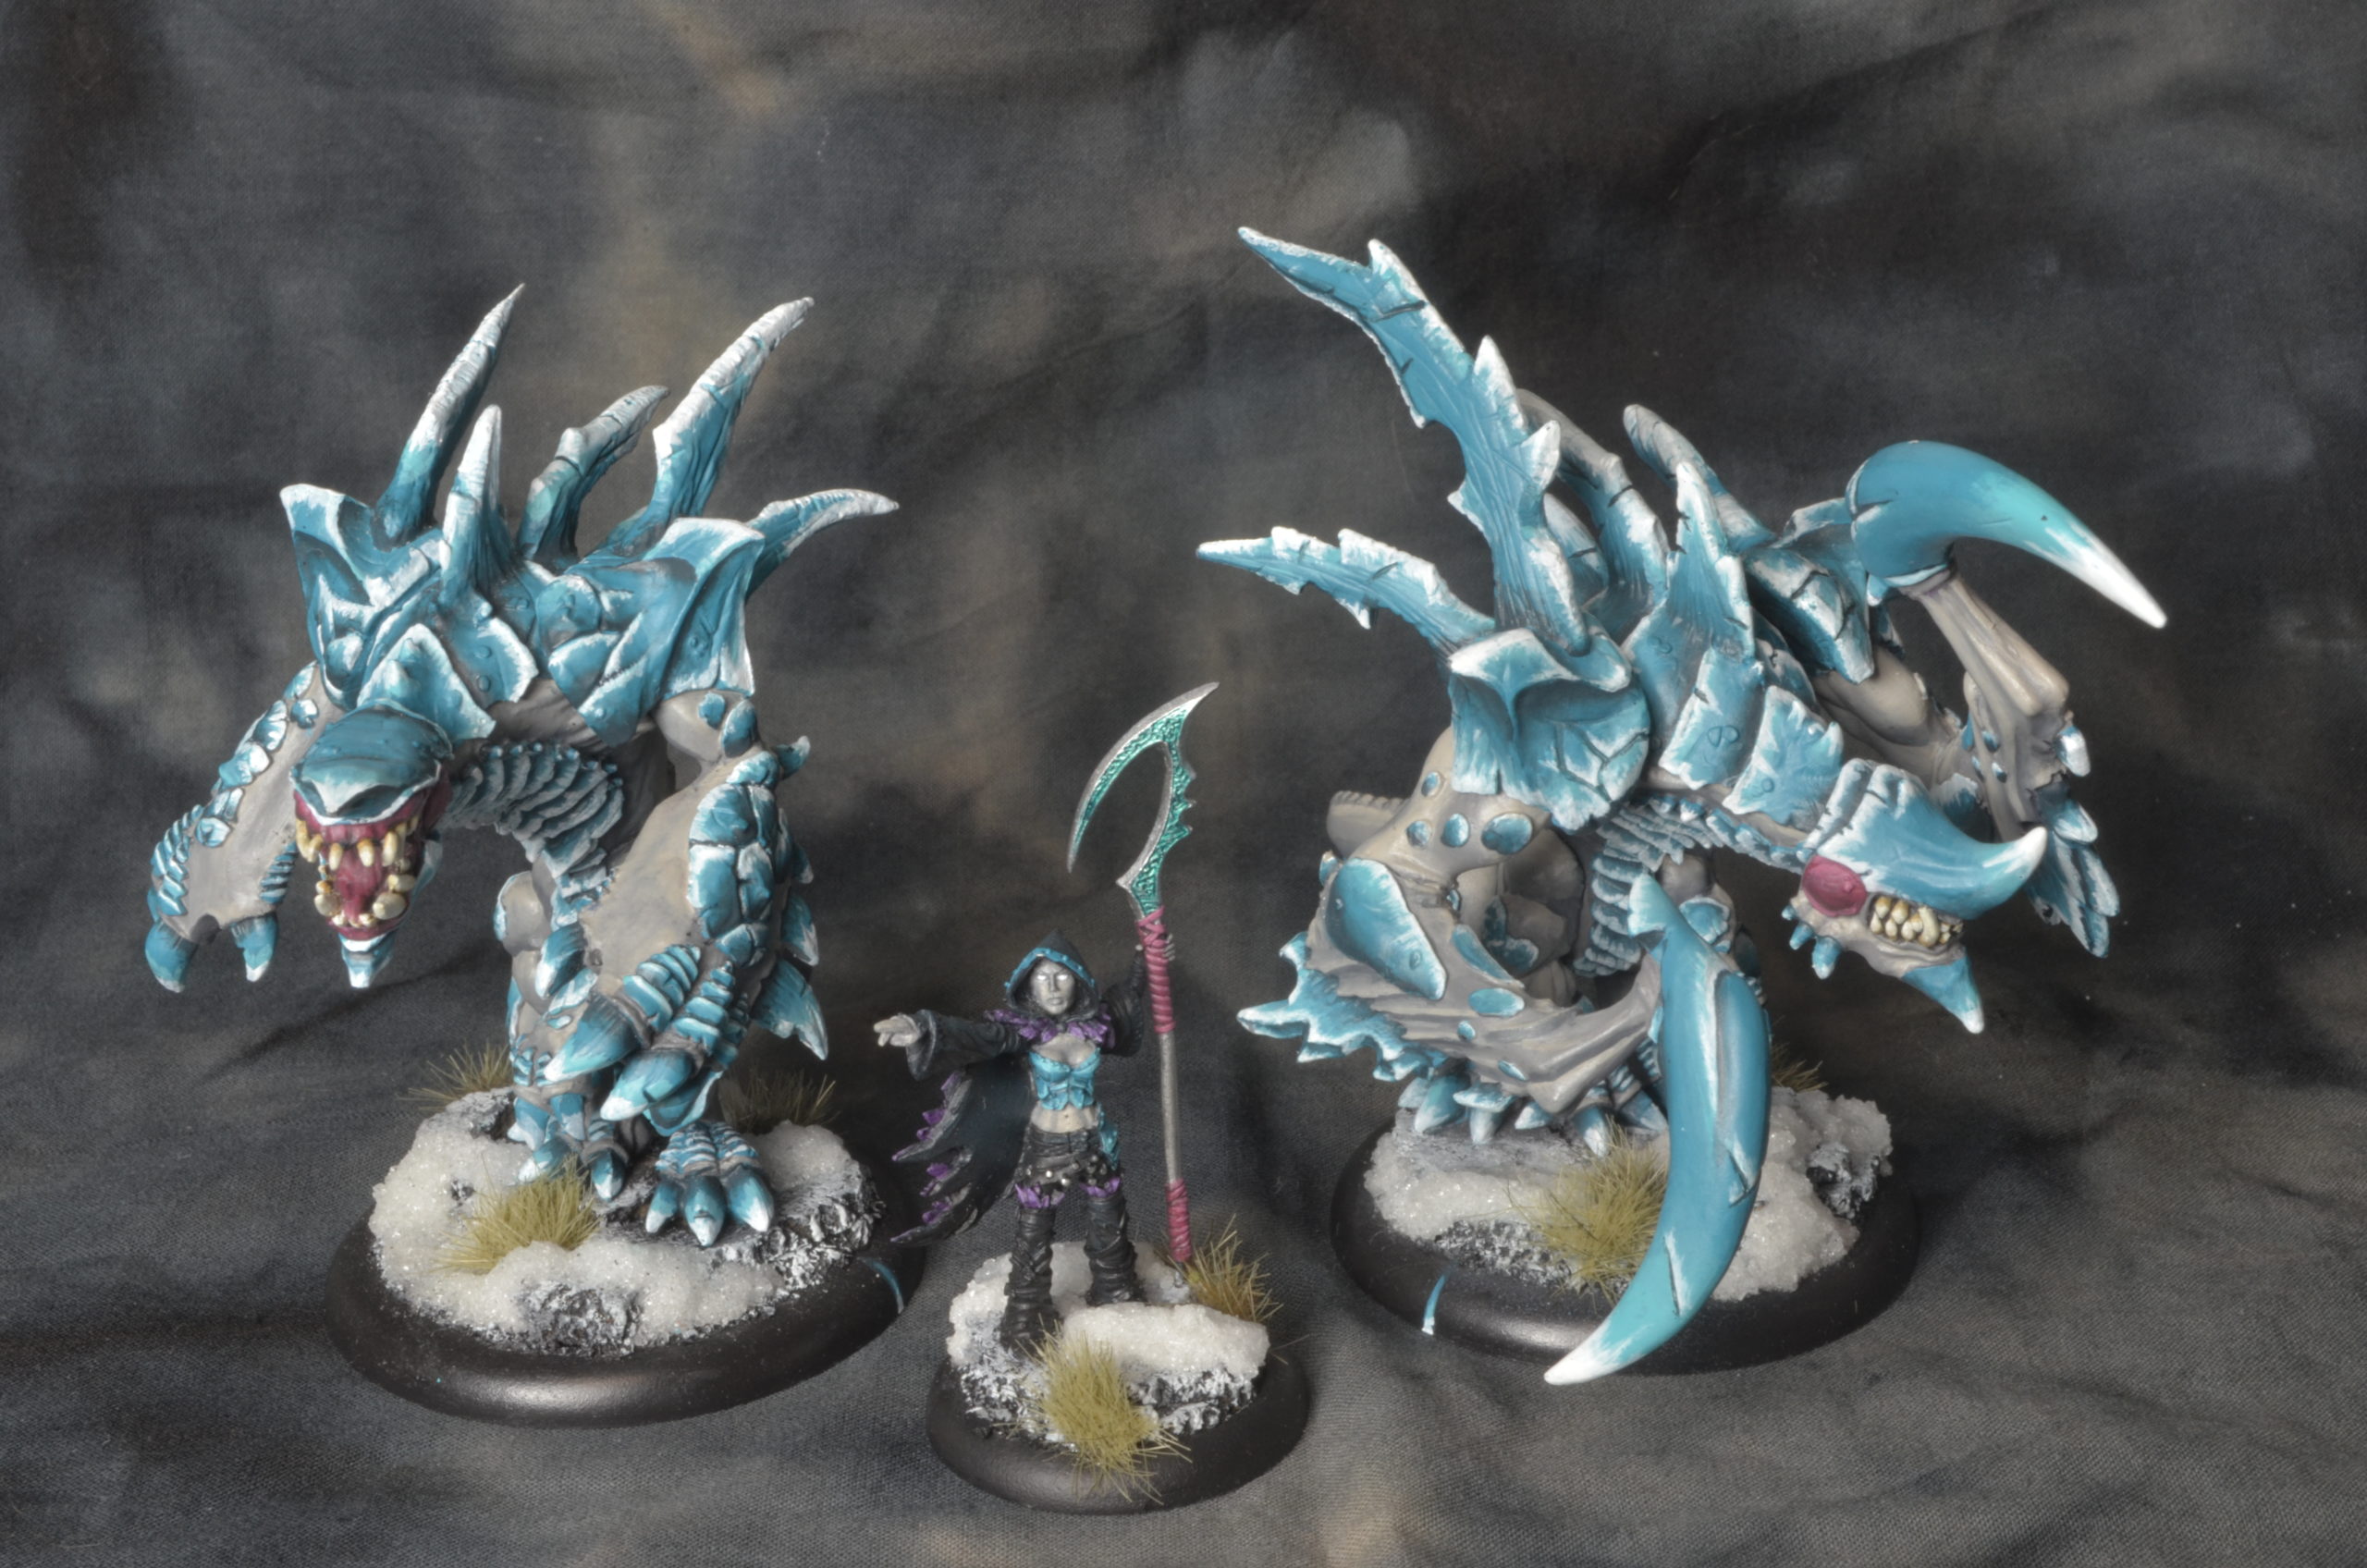
For my Aquablight army with its grey skin, I use a number of custom mixes. The mid-tone is Great Coat Grey mixed with MIdlund Flesh. The shadows are Great Coat Grey, and I darken that with black when necessary. My highlights use the mid-tone mix combined with Ryn Flesh.
For black skin, base with a warm brown, like Battlefield Brown. Shade down with purple. The P3 line doesn’t have a dark purple, so mix Exile Blue and Sanguine Base into the mid-tone. For highlights, mix in some orange or flesh tones into the brown.
I hope this tutorial helped you paint some faces!
Please post questions /comments below, on Facebook, or via Twitter!
Thanks buddy! Guess i need to keep my paint a bit thinner and the use of a reference photo is smart. Also manual shadows and not washing is interesting and something I will need to try! Cheers!
JDW
Solid guide, simple yet clearly adding controled depth. I will often make a more red-tinted shade of the darkest skin tone and hit the lips with a thin line as an additional detail. The slight contrast can help define the upper lip/chin area much like the eyes offsetting nose/brow/cheeks.
Keep these guides coming!