[HtT] [Relic Knights] Quick Glowy Bases
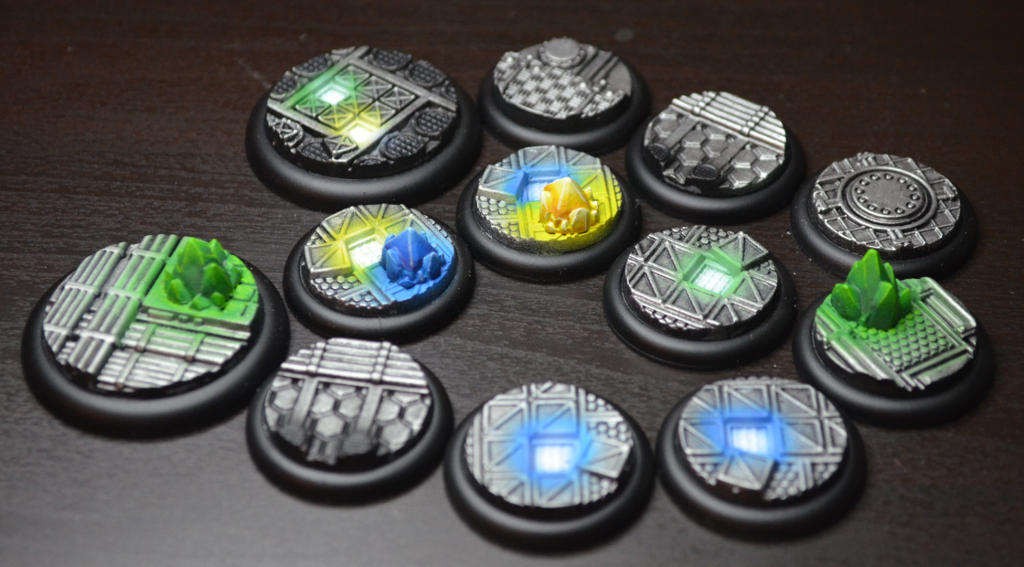
Relic Knight Bases
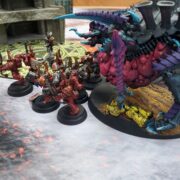
I’m working on getting my first 35 pts of Relic Knights painted up, and wanted to show you how I’ve decided to do my bases.
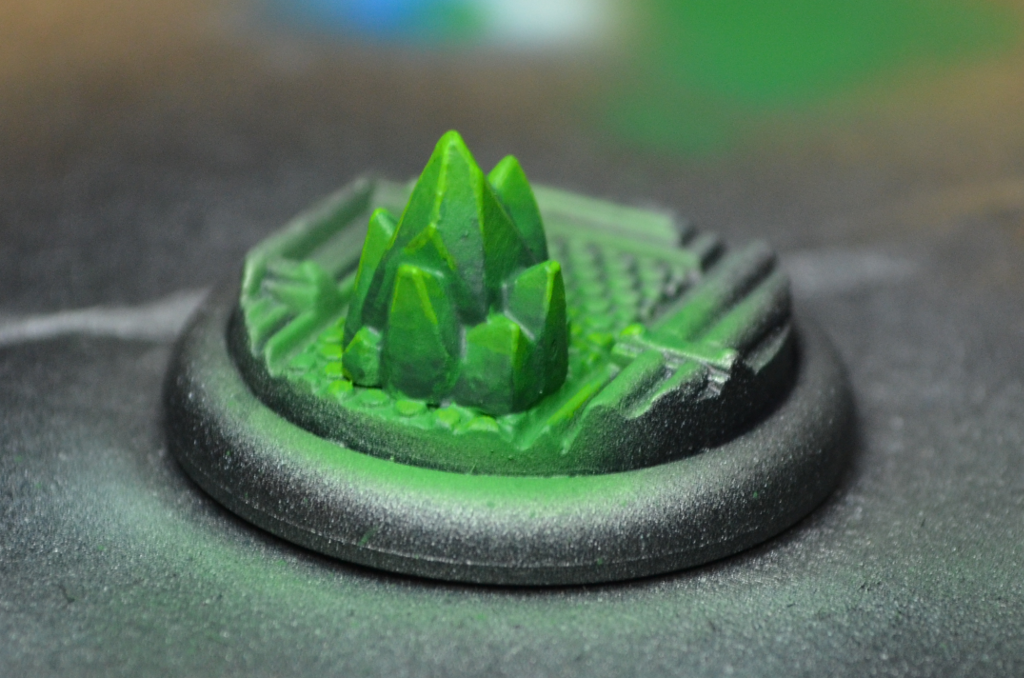
The Kickstarter gave us some neat base inserts that depict grates, piping and opened boxes, and they also included some loose crystals to do whatever we wanted with. Units in relic Knights don’t have a “leader” like they do in Warmachine, but I wanted to include one crystal in each unit, to denote a leader type model, or at the very least, to add something exciting to the unit. I quickly assembled the bases and plopped down a crystal on one base for each unit.
I’ve been wanting to get more practice with my airbrushes, so I figured the crystals would be a great way to play with some OSL utilizing the airbrushes! As you can see, above, the result is great!
The Tutorial
I first stickied all the bases to a spare chunk of cardboard with Sticky tac.
They then all got a coat of Vallejo Black Airbrush Surface Primer, followed by an airbrushed coat of P3 Pig Iron. I used the Grex airbrush for these steps, since it’s a fire hose compared to the Sotar.
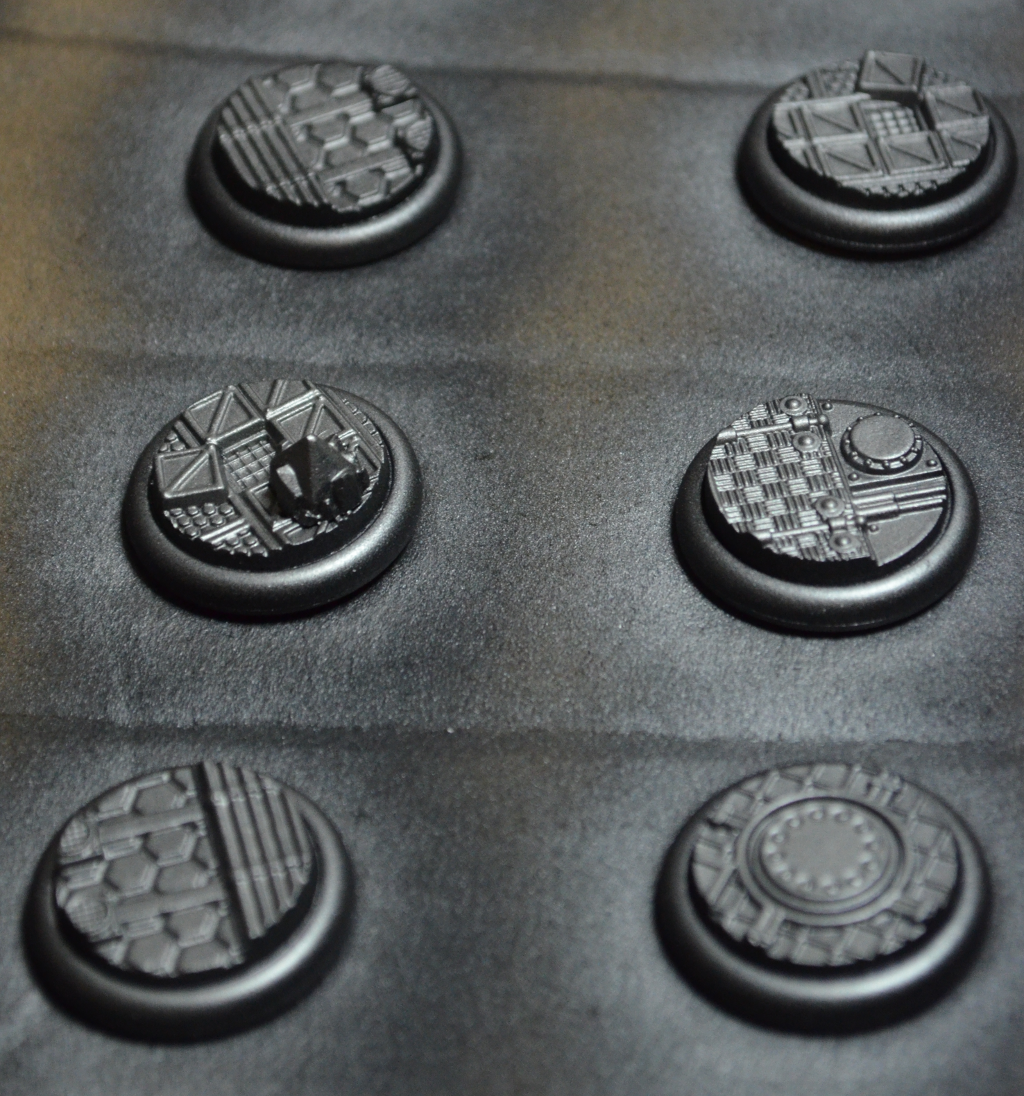
From there, I used a wash of P3 Armor Wash (watered down just a bit, maybe 4:1 wash to water). This adds definitions, small shadows and breaks up the uniform look. After that was dry, they all got a drybrush with P3’s Cold Steel (one shade lighter than the Pig Iron). Here you can see a washed base (left) and a drybrushed base (right). The difference is subtle, but the important bit is that it makes the metals shiny again.

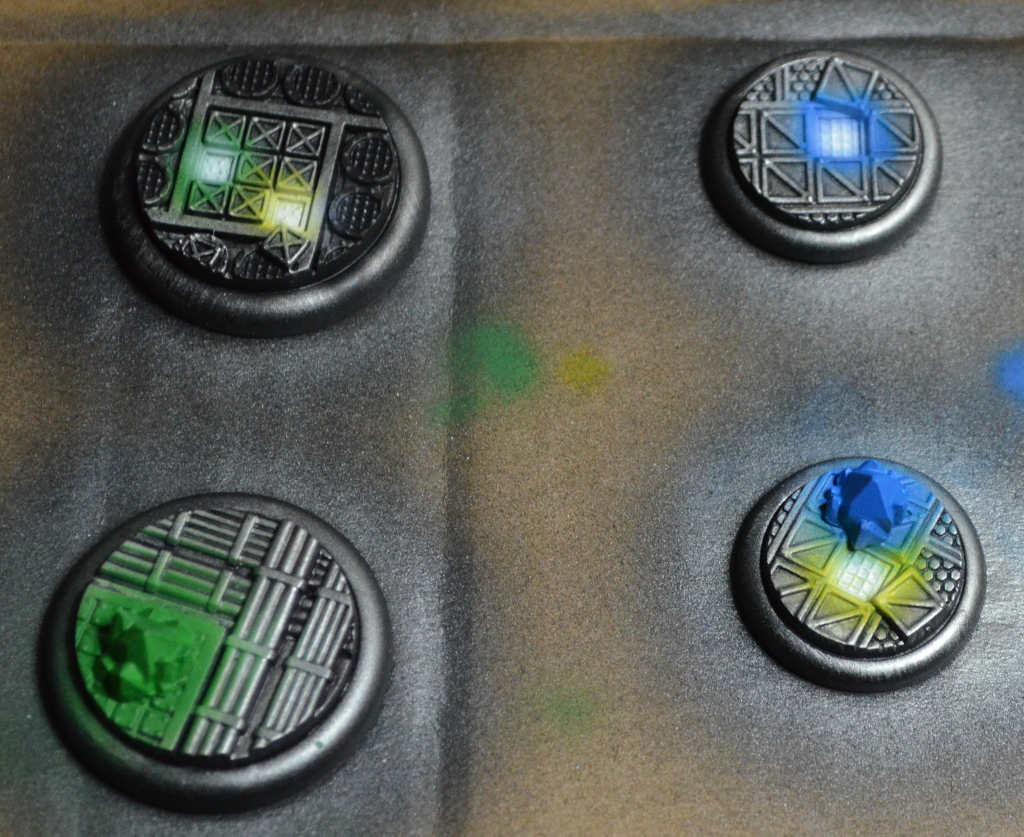
Next, I got out the airbrush again, but the Sotar this time since it’s dual action and thus offers better control and more precision. All the crystals and open boxes got a shot of Vallejo Airbrush White Surface Primer. I didn’t worry too much about staying inside the lines, since I wanted lots of spill over to give me the glow effects.
Now that I had a good bright undercoat for my bright glowy bits, the white areas got a shot of the mid-tone color for the chosen Esper:
- Blue: P3 Cygnar Blue Highlight
- Green: P3 Iosan Green
- Yellow: P3 Cygnus Yellow
Lastly, those spots inside open boxes got another hit in the center with the White Primer to give them a white-hot glowy center.
After that, it’s all brush-work.
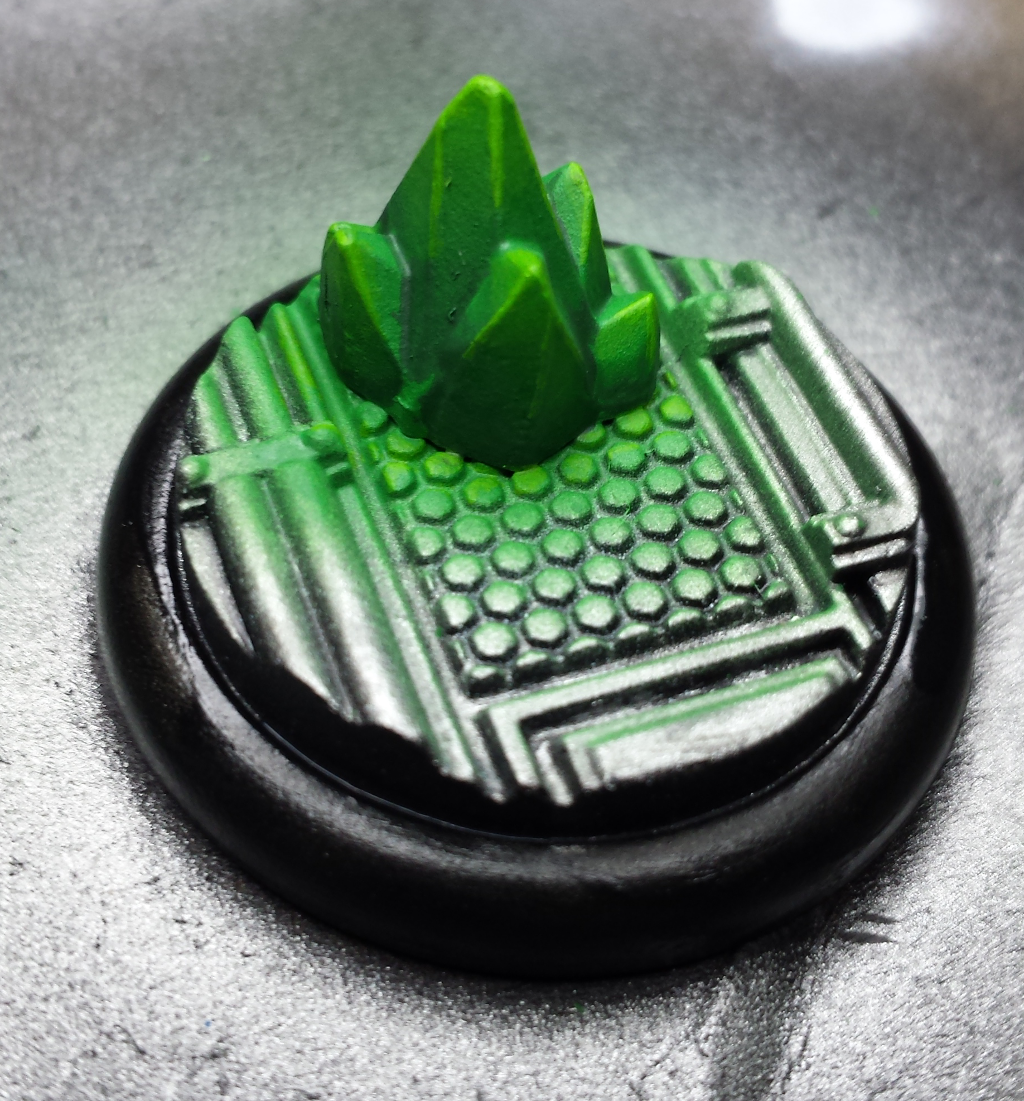
I only have a single green crystal done thus far, but I think it shows off the effect I’m after nicely.
I 2-brush blended the shadows in using P3 Gnarls Green, and used a 1:1 mix of Iosan and P3 Necrotite Green for the lighter tips. Then, the edges all got a lin / edge highlight with pure Necrotite Green. Lastly, I did a quick drybrush of Necrotite Green on the OSL areas closest to the crystal.
I’ll use similar colors for the other colored crystals, but I’ll need to be careful to not go too orange on the yellow crystal, since there is an Orange Esper, and that should stay unique.
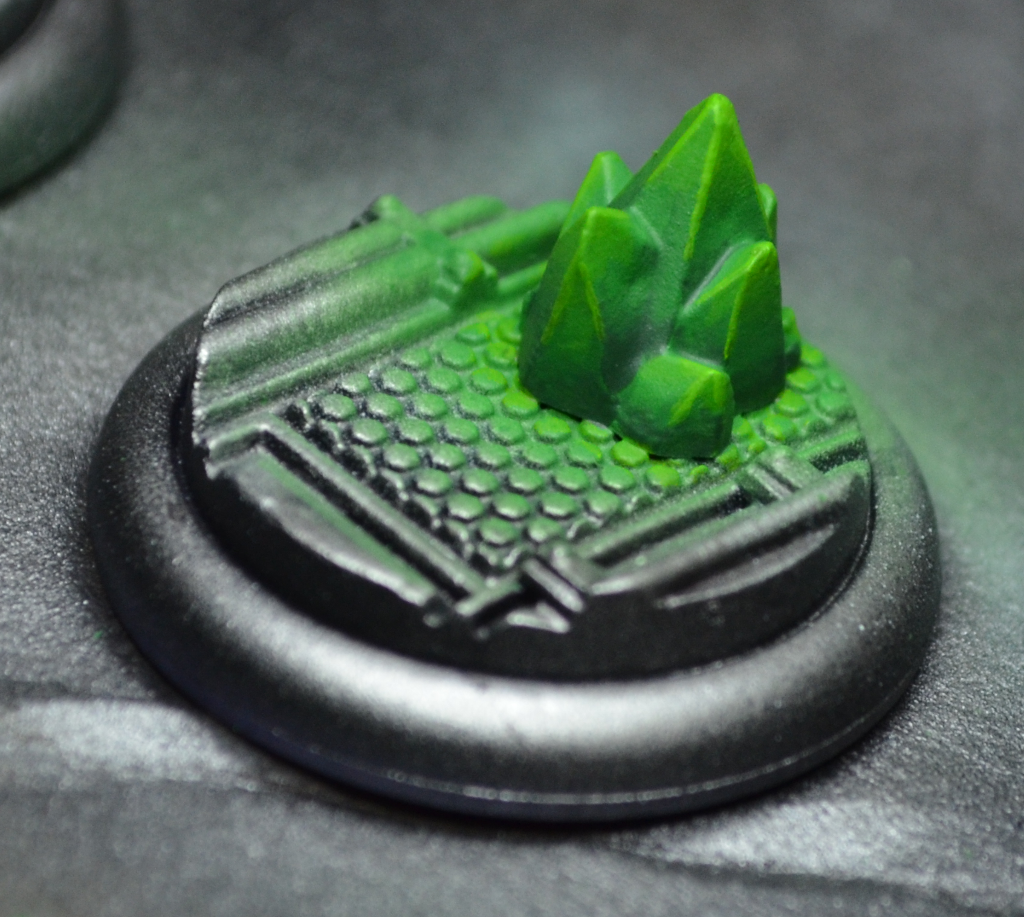
I think the OSL looks pretty good for my first real go at it, but the rest of the base being all one color looks a bland by comparison. That said, since the model itself will cover a fair bit of the non crystal parts of the base, this is probably fine. Additionally, I want these table ready ASAP, so I’m just going for table-top quality and the glowy bits will gather the viewer’s attention enough that most people won’t see the rest of the base.
Anyway, after all the brush work is done, I quickly masked off everything but the rims, and hit the rims with a coat of my black primer.
That’s all for today, I hope you enjoyed the quick walk-through.
Audience Participation
Is there a new painting technique or tool you are excited to try out?
Your Grex isn’t a dual action?
these look great btw.
It’s the pistol grip one, so there’s only one direction. Pulling the trigger part way turns on the air, and then you pull further to start the paint flow.
I keep a larger needle in it, so it’s great for primer, bases, basecoats, etc. I keep a smaller needle in my Sotar for detail work.
Ah ok, through me off there for a minute. I do the same for my Iwata (larger needle) and Badger.
Those bases look great! I’d love to learn how to do something useful with my airbrush.
neato!
Circi Speed Circuit?
Shattered Sword!